Gin + Swagger快速生成API文档
一 背景
在restful前后端项目进行接口对接的时候,需要有明确的接口文档,此时单独针对接口编写接口文档,耗时耗力,切代码修改后,还需要维护接口文档,此时容易出现文档不统一的情况,将接口文档直接写在代码中是一种比较好的方式。
swagger就是解决这种问题,开发人员只需要按照特定规范在编写接口代码时写上swagger注释,利用swagger生成接口文档。
二 Swagger UI简介
Swagger 是一个 API 生成工具,可以生成文档。 Swagger 是通过编写 yaml 和 json 来实现文档化。并且可以进行测试等工作。
通过 swagger 可以方便的生成接口文档,方便前端进行查看和测试。
三 项目集成
3.1 安装swag
3.2 生成文件
首次生成相关文件,后期代码修改过,添加swag注解后,也需要
# 在go 项目中(包含main.go)的目录,使用swag init命令生成相关文件。
$ swag init
2021/09/23 16:32:23 Generate swagger docs....
2021/09/23 16:32:23 Generate general API Info, search dir:./
2021/09/23 16:32:26 create docs.go at docs/docs.go
2021/09/23 16:32:26 create swagger.json at docs/swagger.json
2021/09/23 16:32:26 create swagger.yaml at docs/swagger.yaml
3.3 安装gin-swagger
3.4 集成
- 引入生成的docs包
- 在具体接口上根据规范swag编写接口描述
- 在路由中进行引入
- 再次执行swag init 更新接口
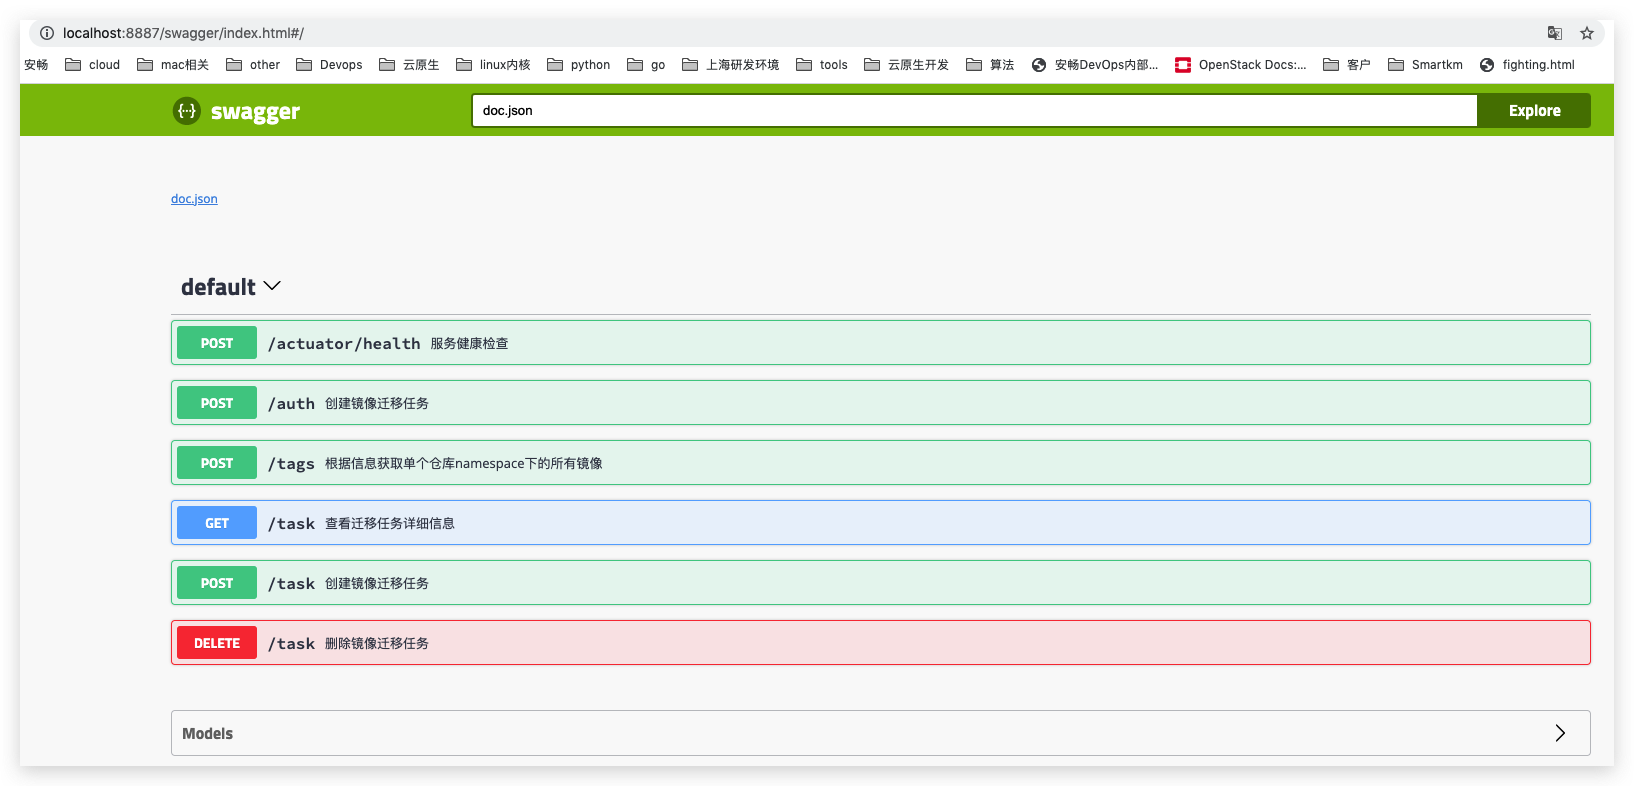
- 运行应用后,浏览器访问:http://localhost:8887/swagger/index.html
package main

import (
    "github.com/gin-gonic/gin"
    swaggerFiles "github.com/swaggo/files"
    ginSwagger "github.com/swaggo/gin-swagger"

    _ "github.com/swaggo/gin-swagger/example/basic/docs" // docs is generated by Swag CLI, you have to import it.
)

// @title Swagger Example API
// @version 1.0
// @description This is a sample server Petstore server.
// @termsOfService http://swagger.io/terms/

// @contact.name API Support
// @contact.url http://www.swagger.io/support
// @contact.email support@swagger.io

// @license.name Apache 2.0
// @license.url http://www.apache.org/licenses/LICENSE-2.0.html

// @host petstore.swagger.io
// @BasePath /v2
func main() {
    r := gin.New()

    url := ginSwagger.URL("http://localhost:8080/swagger/doc.json") // The url pointing to API definition
    r.GET("/swagger/*any", ginSwagger.WrapHandler(swaggerFiles.Handler, url))

    r.Run()
}
四 不同类型
4.1 请求
4.1.1 url参数
4.1.2 body参数
例如json
4.2 返回
4.2.1 字符串
4.2.2 结构体返回
// @Success 200 {object} models.Response "请求成功"
// @Failure 400 {object} models.ResponseErr "请求错误"
// @Failure 500 {object} models.ResponseErr "内部错误"
五 实战
5.1 main函数添加全局
// @title smartkm_api_image Swagger Example
// @version 1.0
// @description This is a sample server Petstore server.
// @termsOfService http://swagger.io/terms/

// @contact.name API Support
// @contact.url http://www.swagger.io/support
// @contact.email support@swagger.io

// @license.name Apache 2.0
// @license.url http://www.apache.org/licenses/LICENSE-2.0.html

// @host petstore.swagger.io
// @BasePath /
func main() {
    // 启动服务
    run()
}
5.2 函数级别
5.2.1 Get请求
// @Summary 查看迁移任务详细信息
// @Description 查看迁移任务详细信息
// @Accept json
// @Produce  json
// @Param task_id path string true "task_id"
// @Success 200 {object} models.Response "请求成功"
// @Failure 400 {object} models.ResponseErr "请求错误"
// @Failure 500 {object} models.ResponseErr "内部错误"
// @Router /task [get]
5.2.2 Post请求
// @Summary 创建镜像迁移任务
// @Description 创建镜像迁移任务
// @Accept  json
// @Produce  json
// @Param data body models.CreateTaskReq true "请示参数data"
// @Success 200 {object} models.Response "请求成功"
// @Failure 400 {object} models.ResponseErr "请求错误"
// @Failure 500 {object} models.ResponseErr "内部错误"
// @Router /task [post]
5.2.3 Delete请求
// @Summary 删除镜像迁移任务
// @Description 删除镜像迁移任务
// @Accept  json
// @Produce  json
// @Param data body models.TaskReq true "请示参数data"
// @Success 200 {object} models.Response "请求成功"
// @Failure 400 {object} models.ResponseErr "请求错误"
// @Failure 500 {object} models.ResponseErr "内部错误"
// @Router /task [delete]
注意事项
- 在路由添加swagger的时候,需要引入项目生成的docs包
- 假如func方法头标注的swagger注释不正确,在执行swag init会报错,自行根据报错信息去修改;
- 访问swagger控制台报错404 page not found,是因为没有添加swagger的路由
- 访问swagger控制台报错Failed to load spec,是因为没有import引入执行swag init生成的swagger的docs文件夹;